Manage Accounts
To access the manage accounts page, go to your organization's homepage and click on Manage Accounts in the navigation bar.
This page allows you to view recently registered accounts, create and edit accounts, as well as view account logs.
You can set several attributes of an account on this page, including:
- Username
- Nickname
- Password
- Account Status
- Account Protection
- Two Factor Authentication
- Rank in All Chatrooms
- Single Sign On (SSO)
- Ability to access organization settings
- Ability to manage accounts
- Ability to access chat settings for all chats
- Ability to access direct message archive
Note: Changing certain attributes (e.g. username) will sign the user out of all chats.
You can also view the amount of monthly registered active users.
A user is considered active if they sign into a chat in the past month.
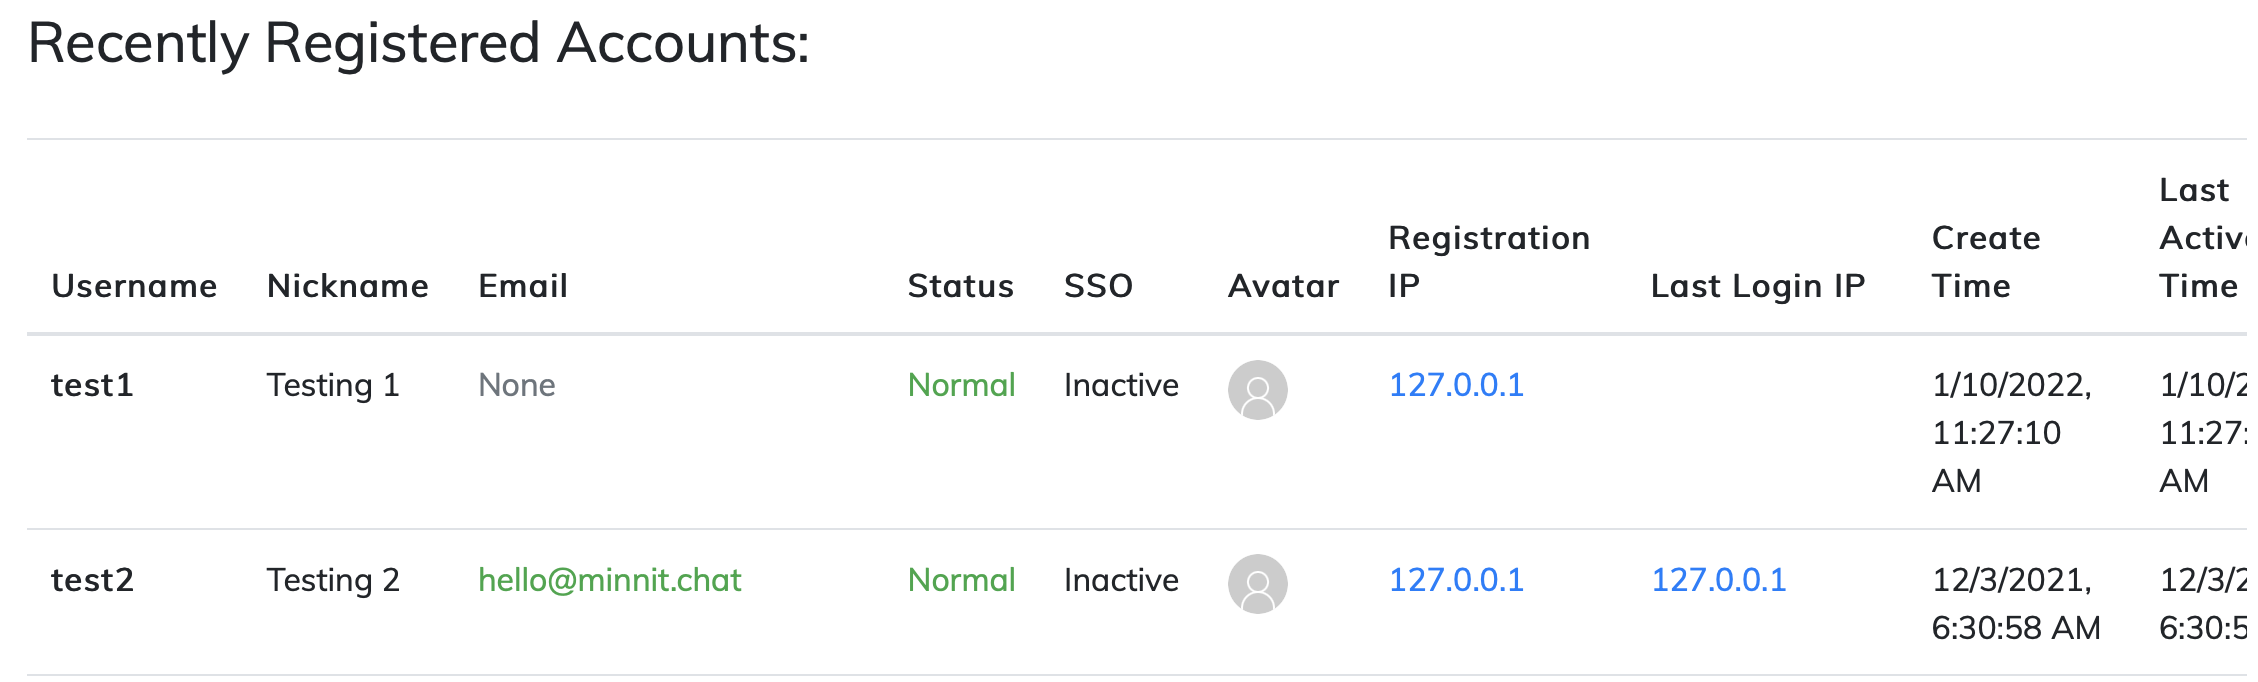
Recently Registered Accounts
Manage Accounts displays the details of recently registered accounts.
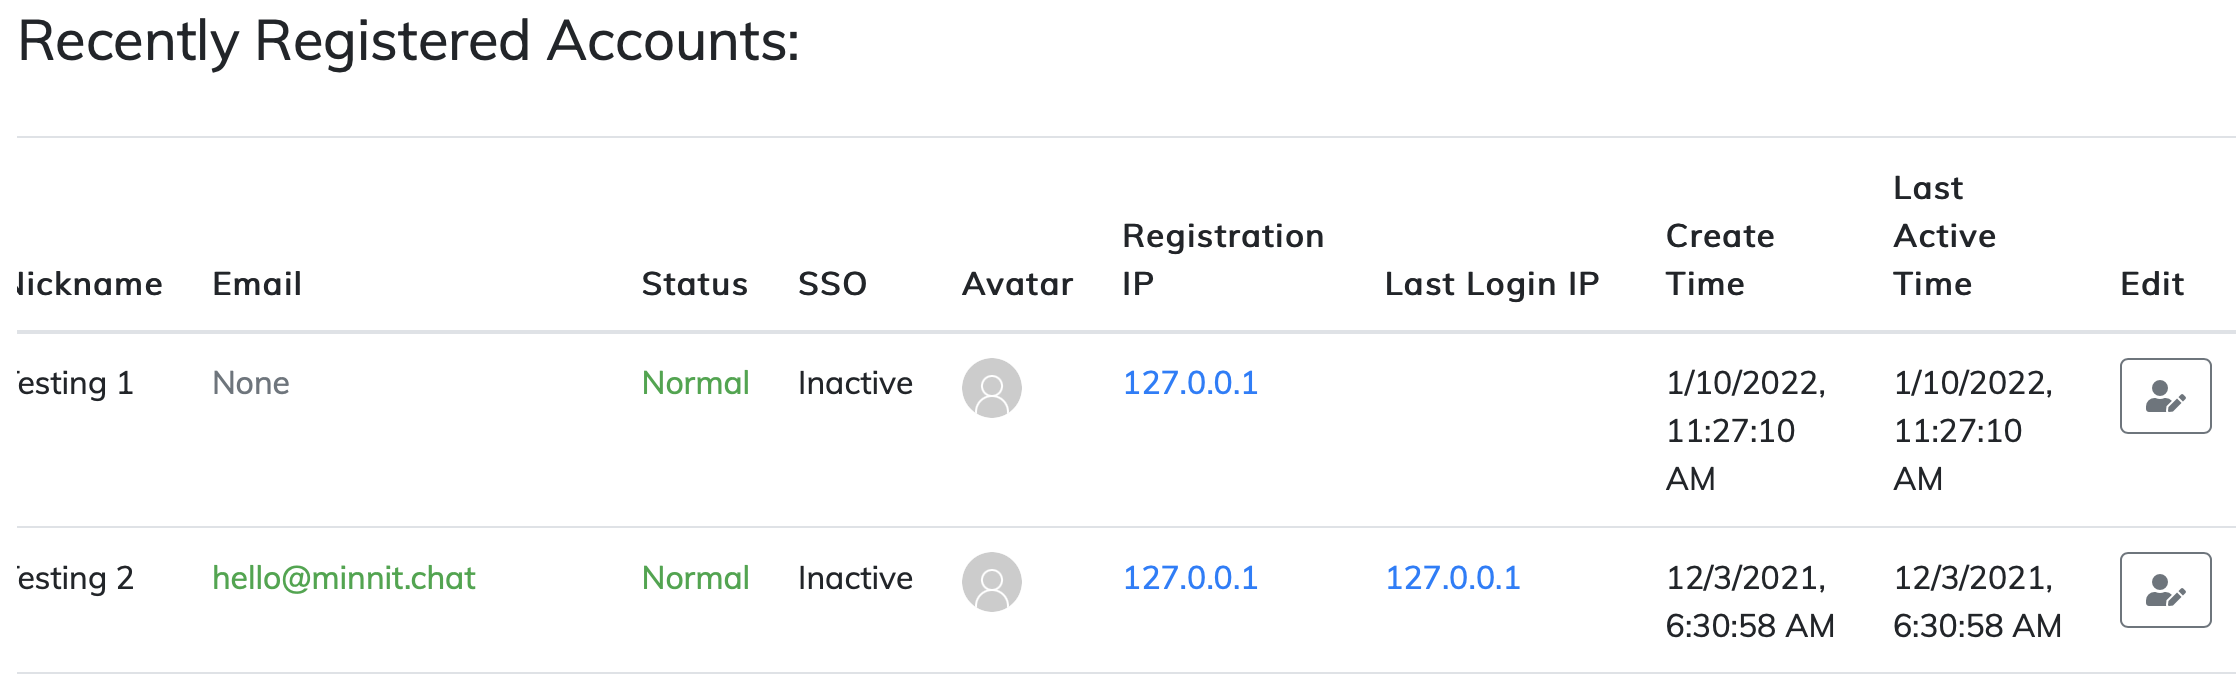
You can also directly edit accounts from this list by horizontally scrolling -- you'll see an edit column with edit buttons for each account like this:
Creating Accounts
Creating an account couldn't be easier.
Hit the Create Account button and you'll be presented with a list of fields to create the account.
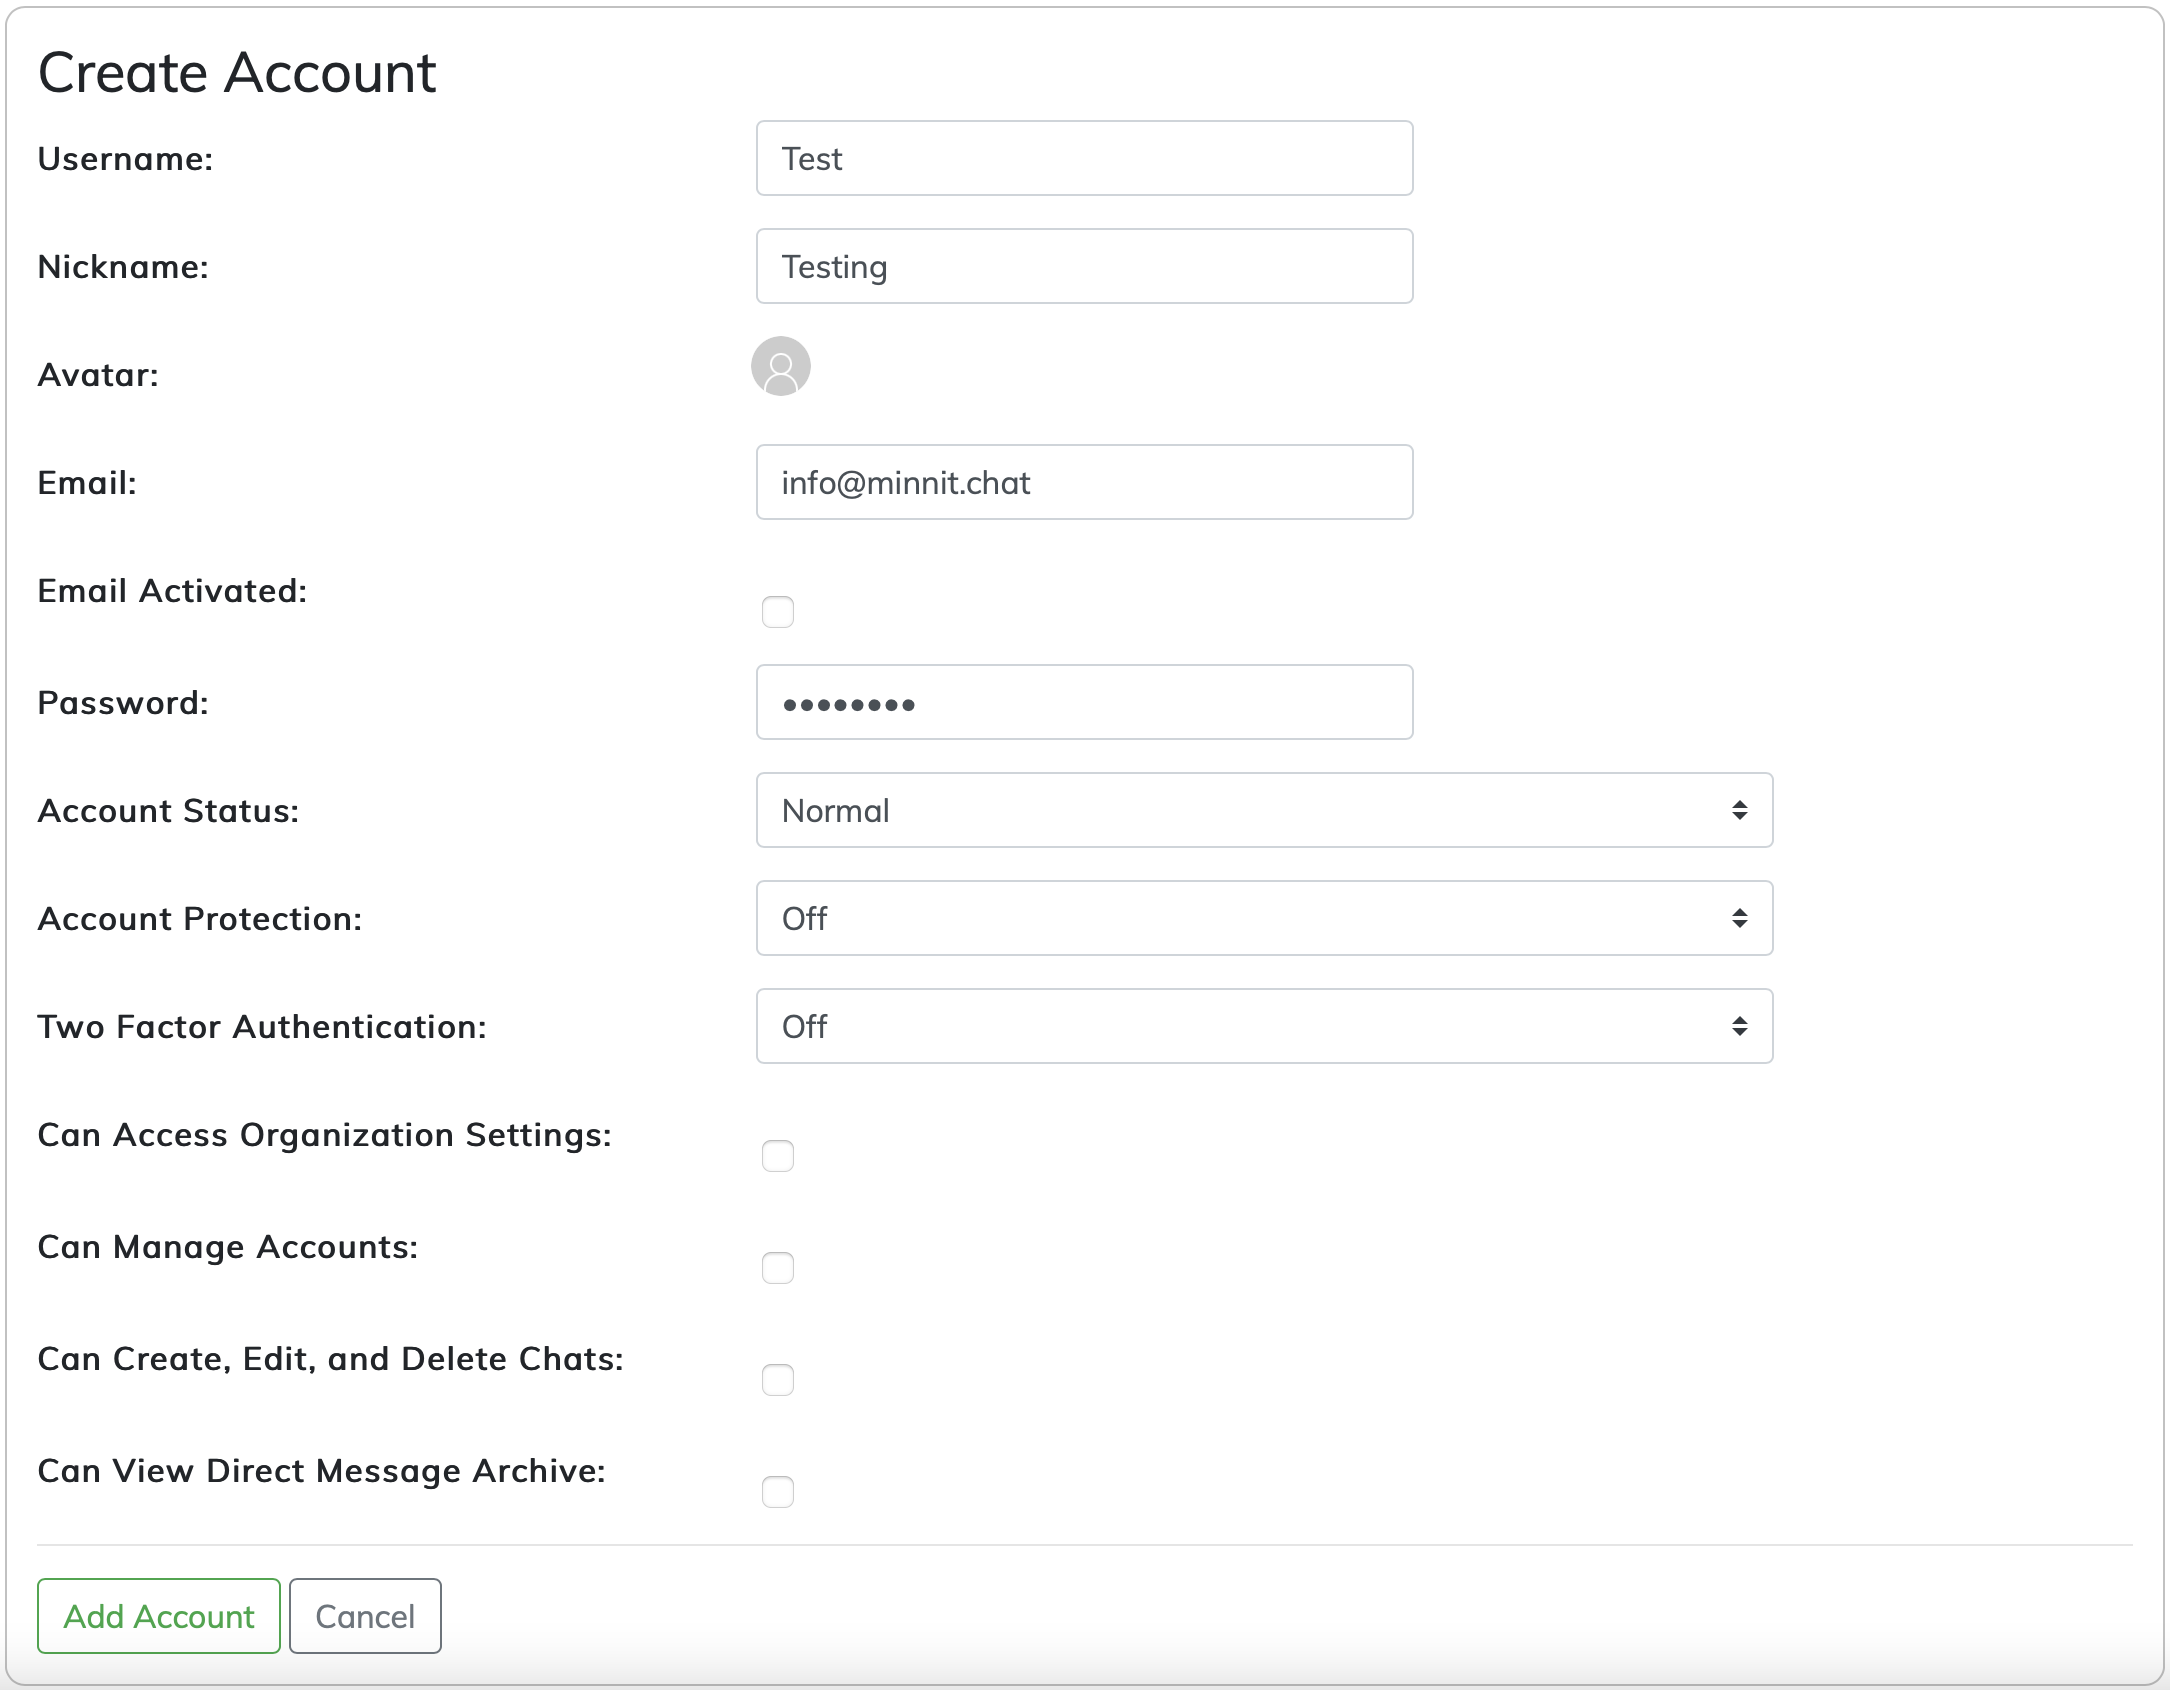
The following fields are required:
- Username
- Nickname
- Password
Once you're entered the details of the account you want to create, click on Add Account and the account will be created.
How many accounts can I create?
There's no limit on the accounts that you can create.
Editing Accounts
To edit an account, either use the search function to find the account you're looking for, or find the account in the recently registered accounts list and click on the edit button .
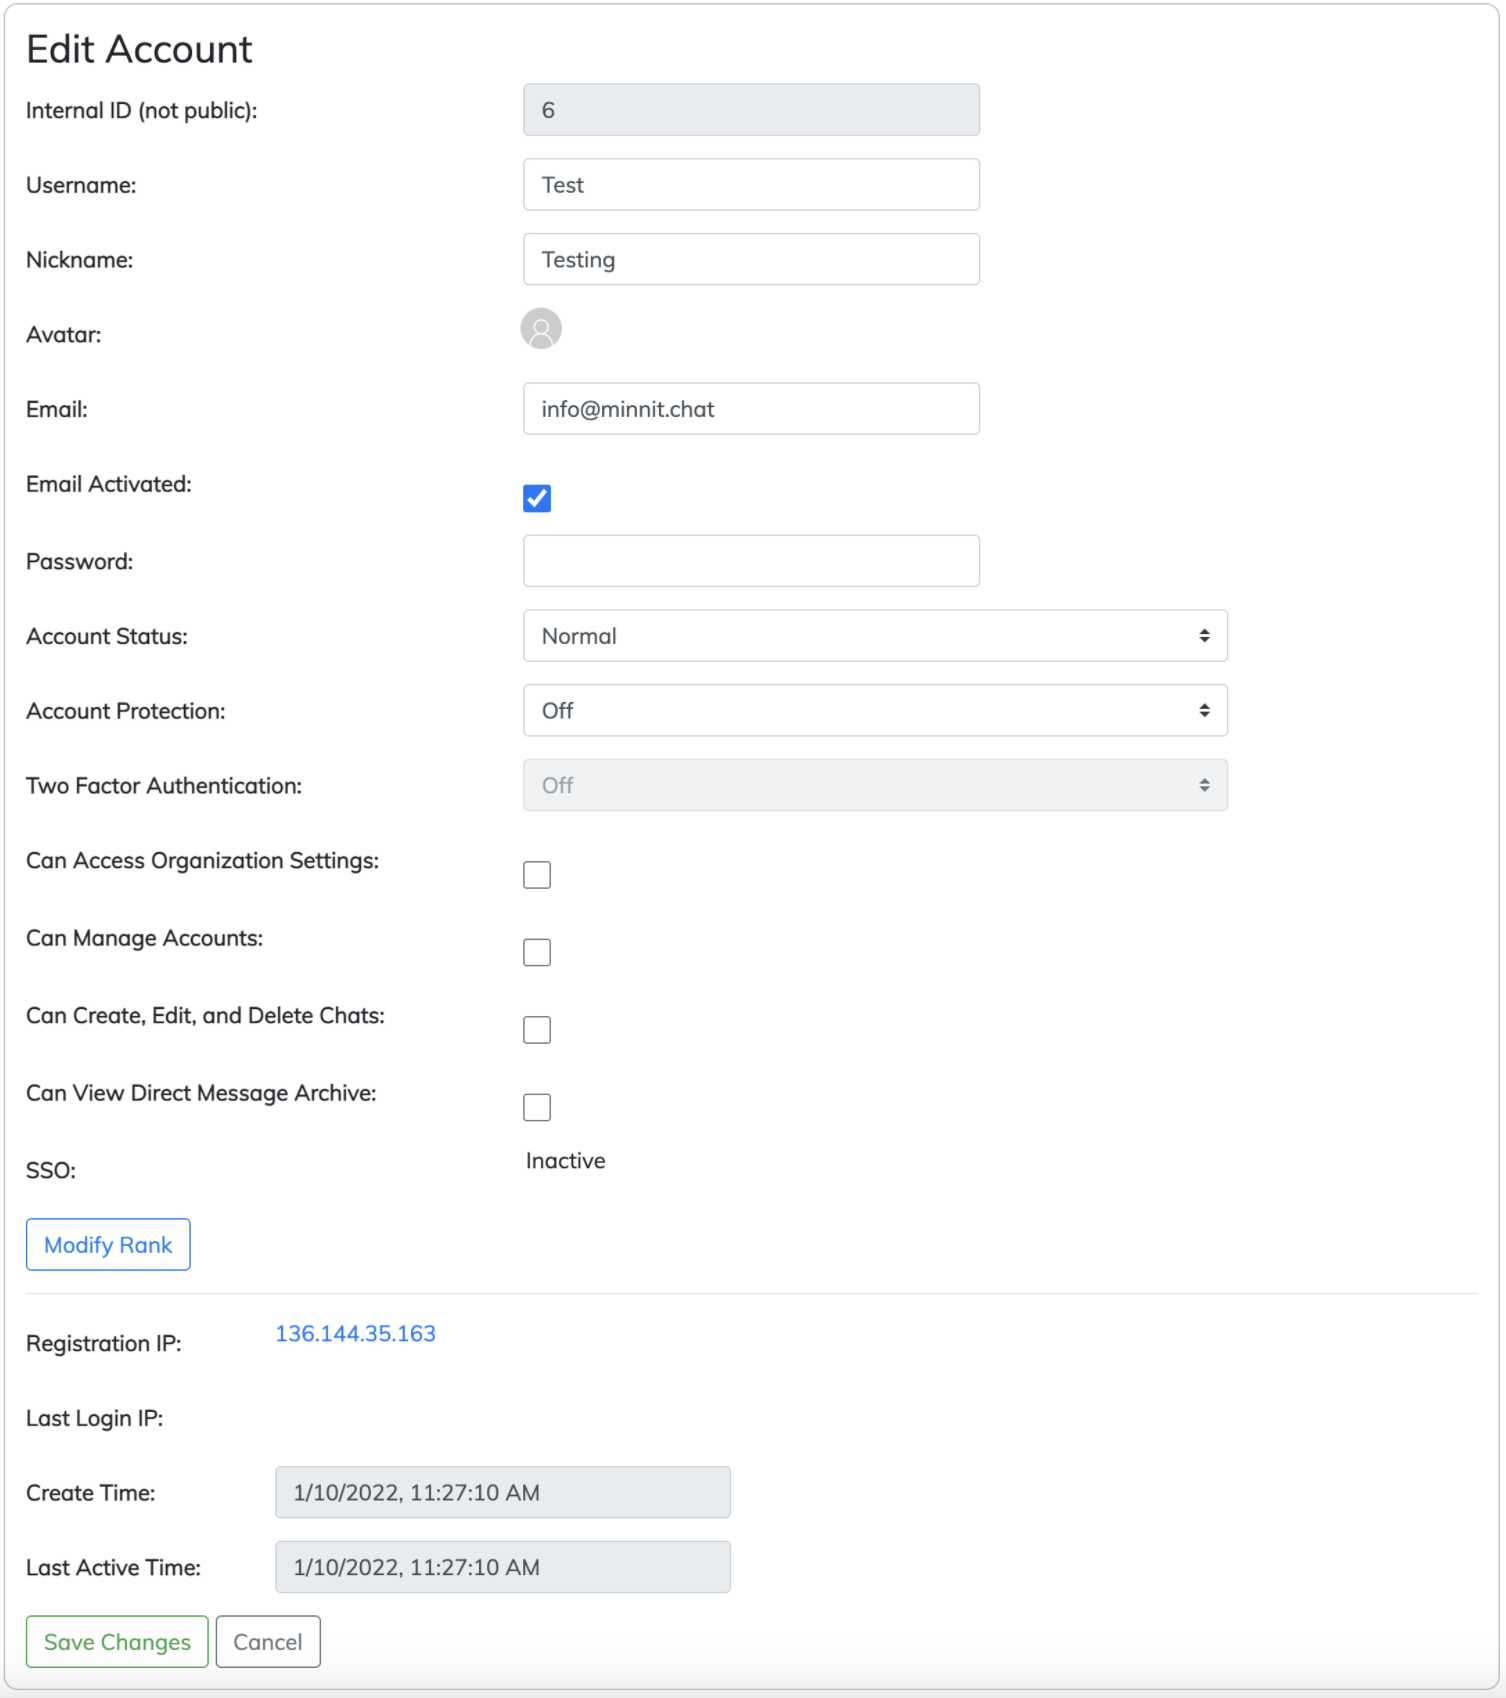
Here you'll be able to edit the existing account information.
Changing the following fields will force the user to refresh if they're signed into any chats:
- Username
- Nickname
Granting permissions
To grant permissions, you can either create a new account or edit an existing account.
Permissions you can grant include:
- Rank in All Chatrooms
- Ability to access organization settings
- Ability to manage accounts
- Ability to access chat settings for all chats
- Ability to access direct message archive
If you grant a user to manage accounts, they will have access to the manage accounts page and will be able to create and edit accounts.
Users with the manage accounts permission will not be able to grant ranks across all chatrooms unless their rank is set to Owner across all chatrooms, or if they have the access organization settings permission.
If you set a user's rank to owner across all chatrooms, this will give them the ability to access chat settings for every chatroom.
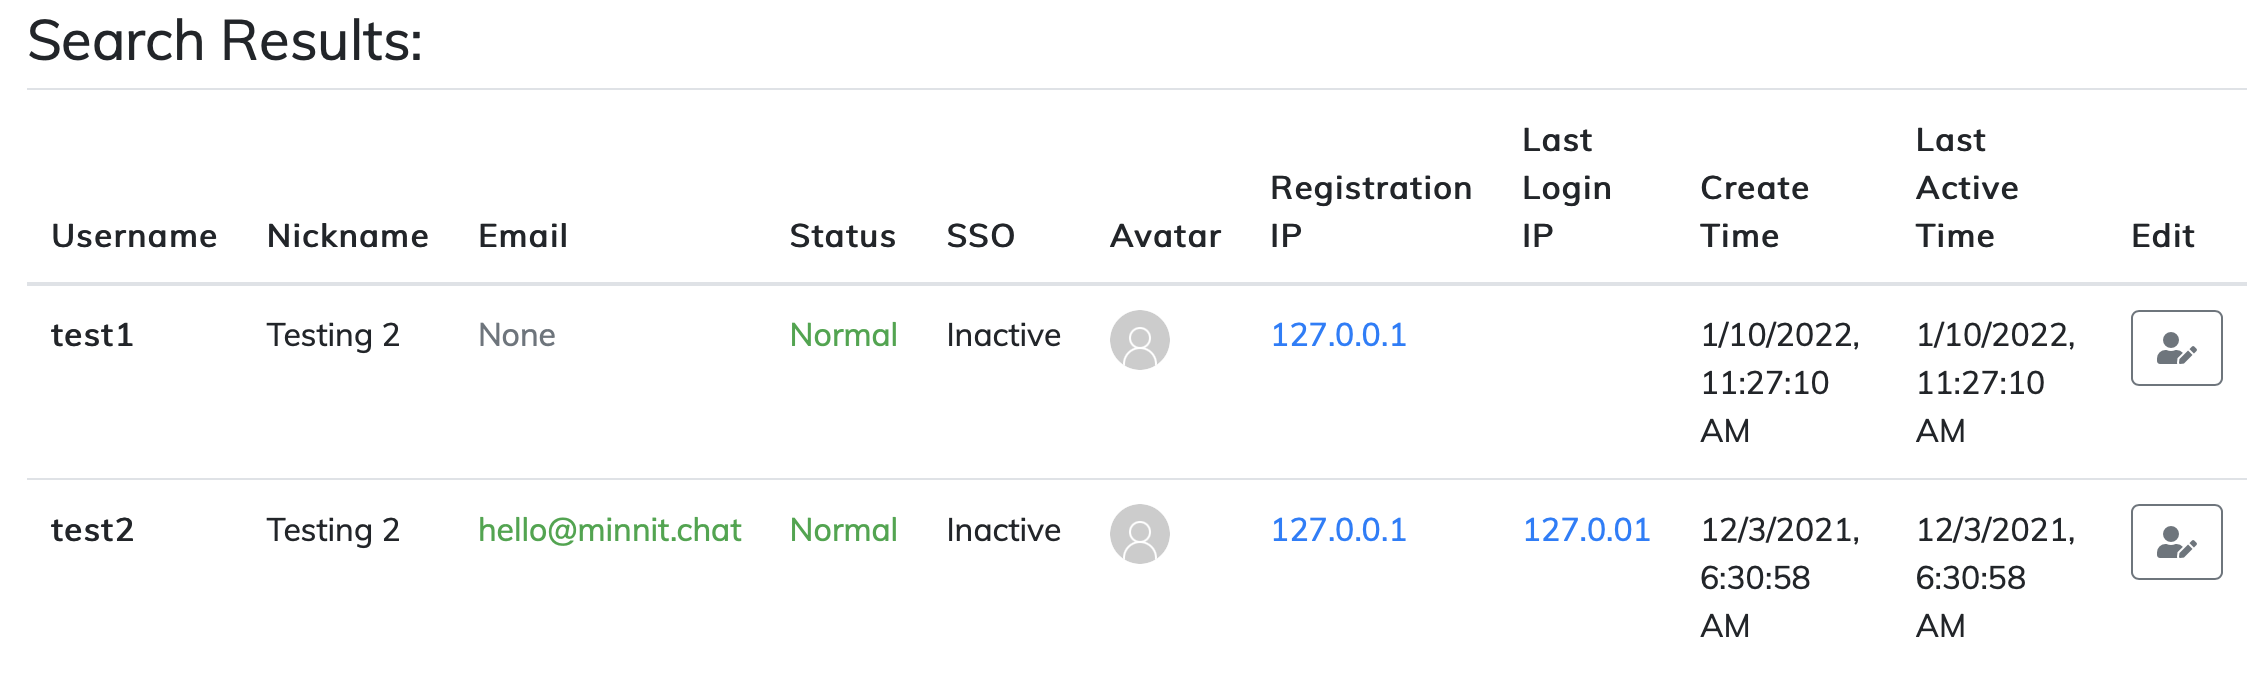
Searching Accounts
Searching for an account is easy -- you just need to know the username (or part of it) or the internal ID of the account.
Internal IDs aren't publicly visible, but if you edit an account you'll be able to see them.
Simply click on the Search button, enter the username/ID of the account and hit Search again.
You'll see search results like this:
Viewing Account Logs
Viewing account logs is easy. You can view logs by username, user ID, email, or IP.
Simply click on the View Logs button, enter the username/ID/email/IP and click on Get Logs.
You'll see results like this:
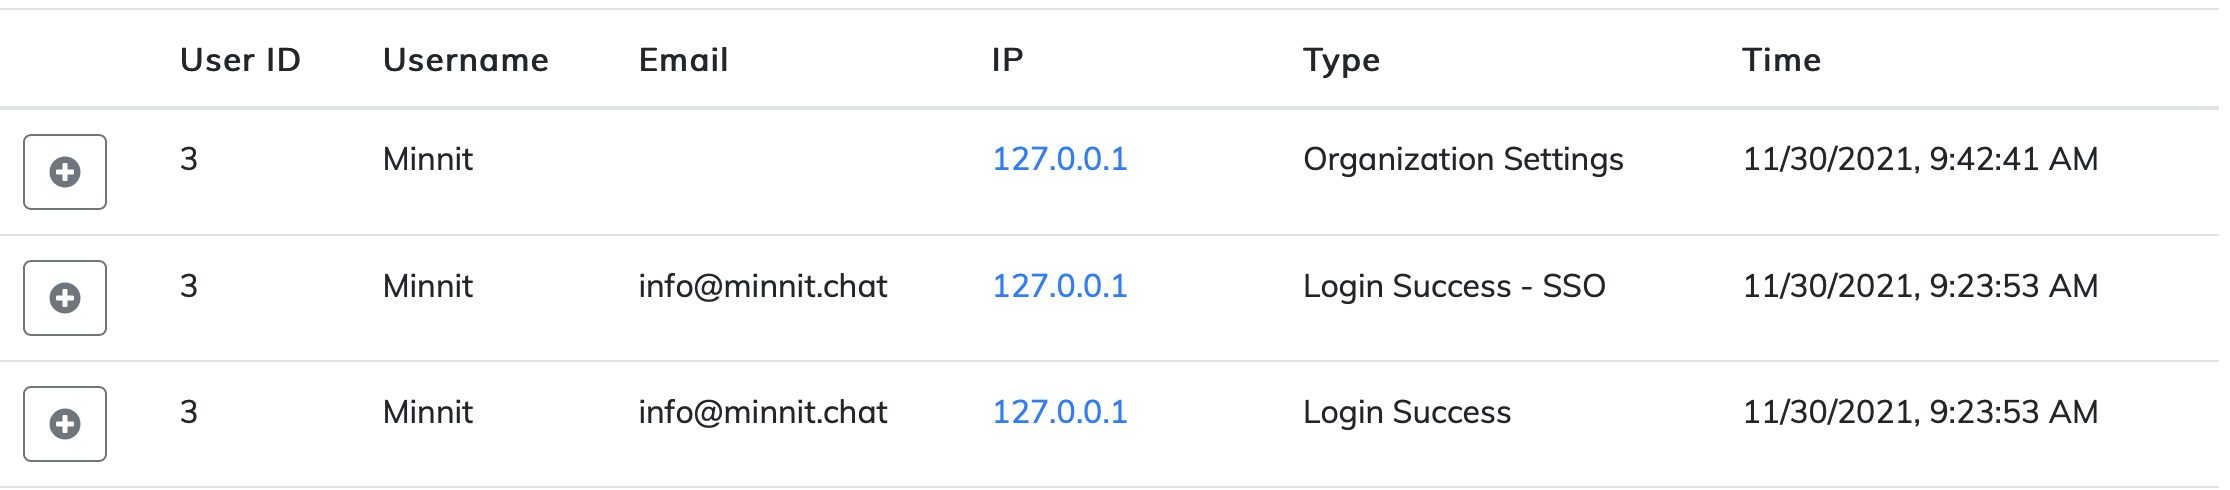
You can also click on the plus button to see more details.
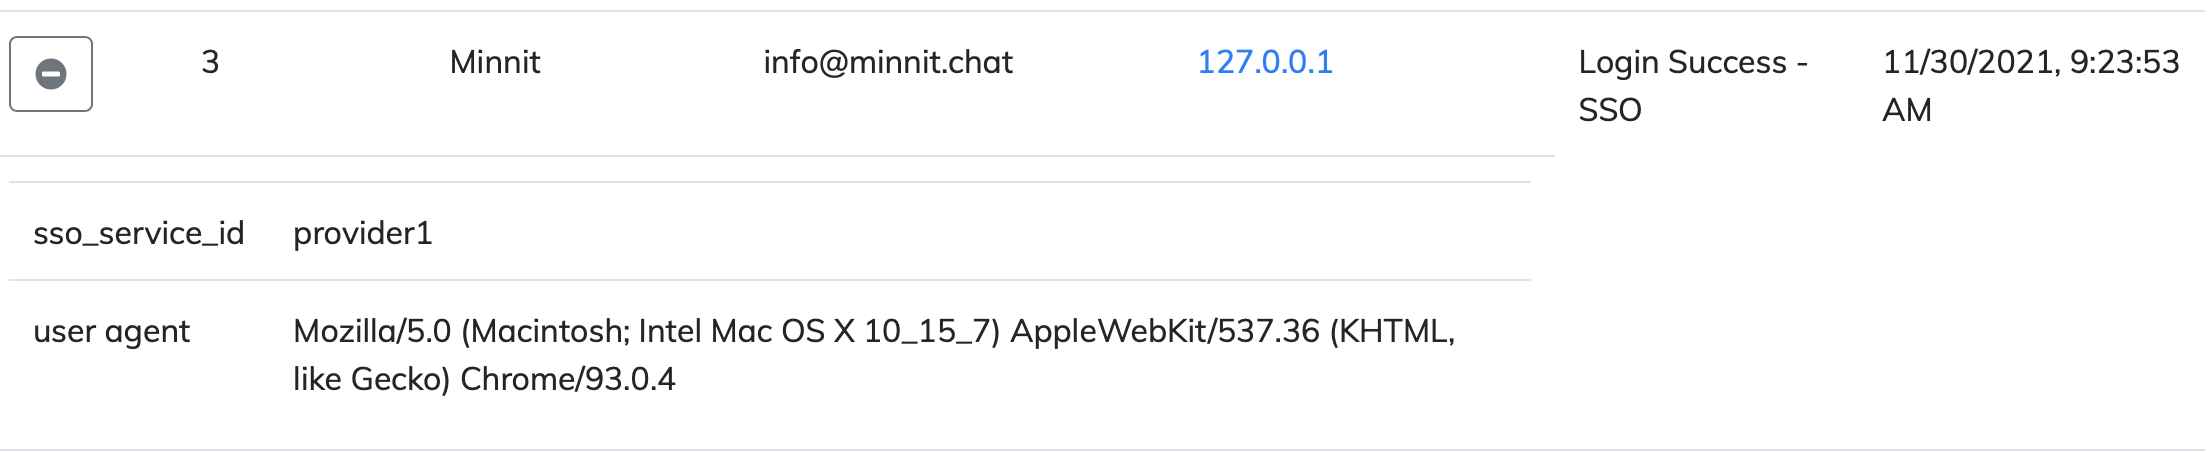
The following information is logged:
- Login attempts
- Changes to account details
- Changes to organization settings
Account Details
What happens when I block or delete an account?
Blocked accounts can still login, but they will not be able to sign into any chat.
If you delete an account, the user will be signed out from all chats and their data will be permanently removed from the database.
What is account protection and two factor authentication?
Account protection and two factor authentication are account features that help protect the account from unauthorized access.
If you're using Single Sign On (SSO), these will not apply unless you've allowed Minnit security features for accounts.
Exporting
Organizations on the Pro plan or higher can export account data as a .csv file.
CSV is a common machine readable format and can be opened in Microsoft Excel.
Options are available to export the following types of information:
- User ID
- Username
- Nickname
- Email Activation Status
- Marketing Consent Status
- Protected Account Data Status
- Avatar URL
- Account Attributes
- SSO Links
- Registration IP
- Last Login IP
- Create Timestamp
- Last Active Timestamp
You also have the ability to filter which accounts are exported before and after certain times, and you can choose to export accounts which have consented to marketing only.
The timestamp represents a UNIX timestamp.
Timestamps can be converted to your local time by using a website like https://epochconverter.com
Converting all timestamps at once is also possible using the DATE function in Microsoft Excel.